hardhat使用的链
hardhat内置开发链是in-process链,不独立启动运行,随同一个测试或者脚本进程而产生销毁
测试用的是内置链,脚本如果不指定–network,则用的是内置链
内置链的名称是hardhat,所以运行脚本时指定network参数为hardhat,跟不指定参数效果相同
脚本运行时可以指定预定义的本地网络localhost,指向http://127.0.0.1:8545/,但是需要我们使用npx hardhat node命令启动本地节点
$ npx hardhat node
Started HTTP and WebSocket JSON-RPC server at http://127.0.0.1:8545/

Accounts
========

WARNING: These accounts, and their private keys, are publicly known.
Any funds sent to them on Mainnet or any other live network WILL BE LOST.

Account #0: 0xf39Fd6e51aad88F6F4ce6aB8827279cffFb92266 (10000 ETH)
Private Key: 0xac0974bec39a17e36ba4a6b4d238ff944bacb478cbed5efcae784d7bf4f2ff80

Account #1: 0x70997970C51812dc3A010C7d01b50e0d17dc79C8 (10000 ETH)
Private Key: 0x59c6995e998f97a5a0044966f0945389dc9e86dae88c7a8412f4603b6b78690d
$ npx hardhat run scripts/deploy.js --network localhost
Lock with 0.001ETH and unlock timestamp 1688291793 deployed to 0x5FbDB2315678afecb367f032d93F642f64180aa3
部署的后,在node节点上会打印相关的信息
eth_accounts
hardhat_metadata (20)
eth_blockNumber
eth_getBlockByNumber
eth_feeHistory
eth_sendTransaction
  Contract deployment: Lock
  Contract address:    0x5fbdb2315678afecb367f032d93f642f64180aa3
  Transaction:         0x8e2ef479bd412546f808857d5face604328e529b747b632a236161c4c03546e4
  From:                0xf39fd6e51aad88f6f4ce6ab8827279cfffb92266
  Value:               0.001 ETH
  Gas used:            326112 of 30000000
  Block #1:            0x2ccccbce4394758f05491733af0758585ed067ff7f5fb1293ad9ad84b464db7a

eth_getTransactionByHash
eth_getTransactionReceipt
eth_blockNumber
hardhat有两个内置的网络,一个是hardhat,另一个就是上面提到的localhost,hardhat不能配置url,使用的是内置链,而localhost可以配置任意url进行覆盖,比如我们部署到Ganache链上,指定Ganache端口为7545,那我们可以这样配置
// hardhat.config.js
module.exports = {
  solidity: "0.8.18",
  networks: {
    localhost: {
      url: 'http://localhost:7545/'
    }
  }
};
$ npx hardhat run scripts/deploy.js --network localhost
Lock with 0.001ETH and unlock timestamp 1688292407 deployed to 0xa8233a432D5Ca4C011FBdc76DD476A55De08d08B
可以看到在Ganeche里面创建了合约,地址和控制台里输出的地址是相同的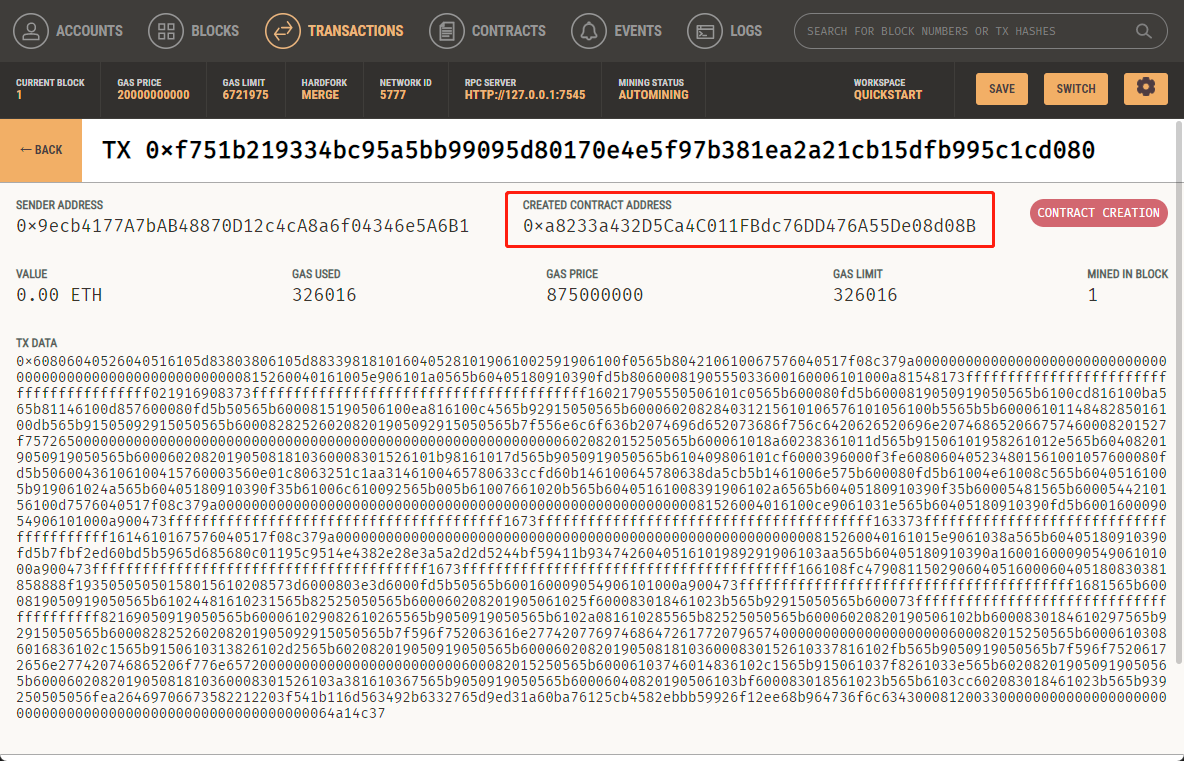
使用hardhat部署测试网合约
除了可以部署在hardhat内置链和Ganache,我们还可以部署到测试网上,部署到测试网我们需要先获取到连接测试网的url,可以在Infura或者Alchemy去申请。
然后我们可以在hardhat配置中进行配置,我这里使用Sepolia的测试网部署。在Alchemy中申请Sepolia测试网的url和API KEY。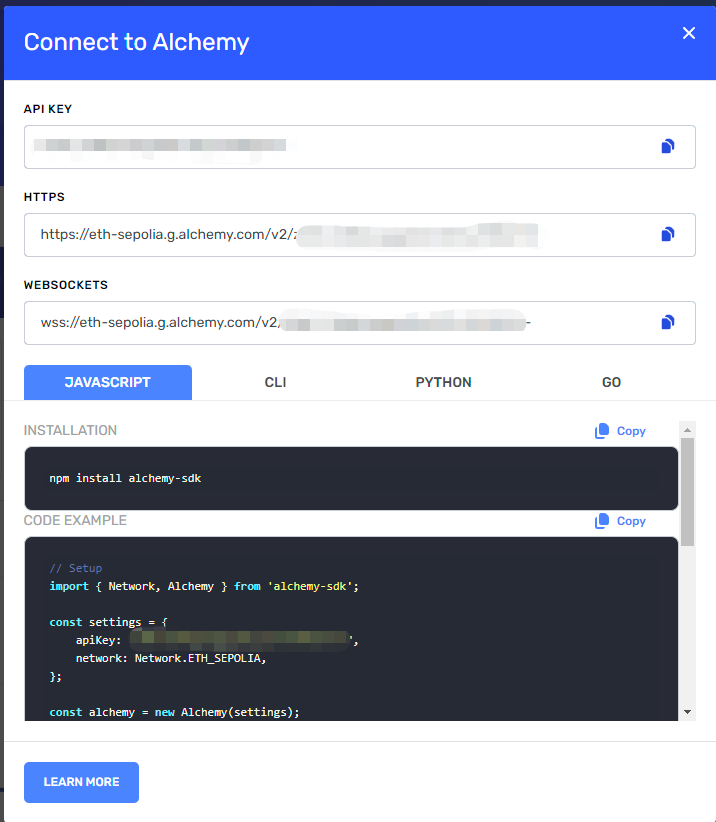
同时我们还需要一个账号,确保里面有足够的币,否则无法部署成功,Sepolia测试网的币可以去这个sepoliafaucet.com水龙头获取,每天可以领0.5个eth。!!!请确保私钥不要暴露了!!!。
有了这两个东西之后我们就可以修改hardhat的配置,如下
- ALCHEMY_API_KEY从Alchemy申请,
const ALCHEMY_API_KEY = "zOWf......7XDj";
const account = '9adf......ed7c'

/** @type import('hardhat/config').HardhatUserConfig */
module.exports = {
  solidity: "0.8.18",
  networks: {
    localhost: {
      url: 'http://localhost:7545/'
    },
    sepoliaTest: {
      url: `https://eth-sepolia.g.alchemy.com/v2/${ALCHEMY_API_KEY}`,
      accounts: [account]
    }
  }
};
然后我们进行部署
$ npx hardhat run scripts/deploy.js --network sepoliaTest
Lock with 0.001ETH and unlock timestamp 1688311413 deployed to 0x1C5B6228a81011F680e6a46aB433c72Ff761E0dC
部署的地址为 0x1C5B6228a81011F680e6a46aB433c72Ff761E0dC,我们可以去etherscan上看看合约有没有部署成功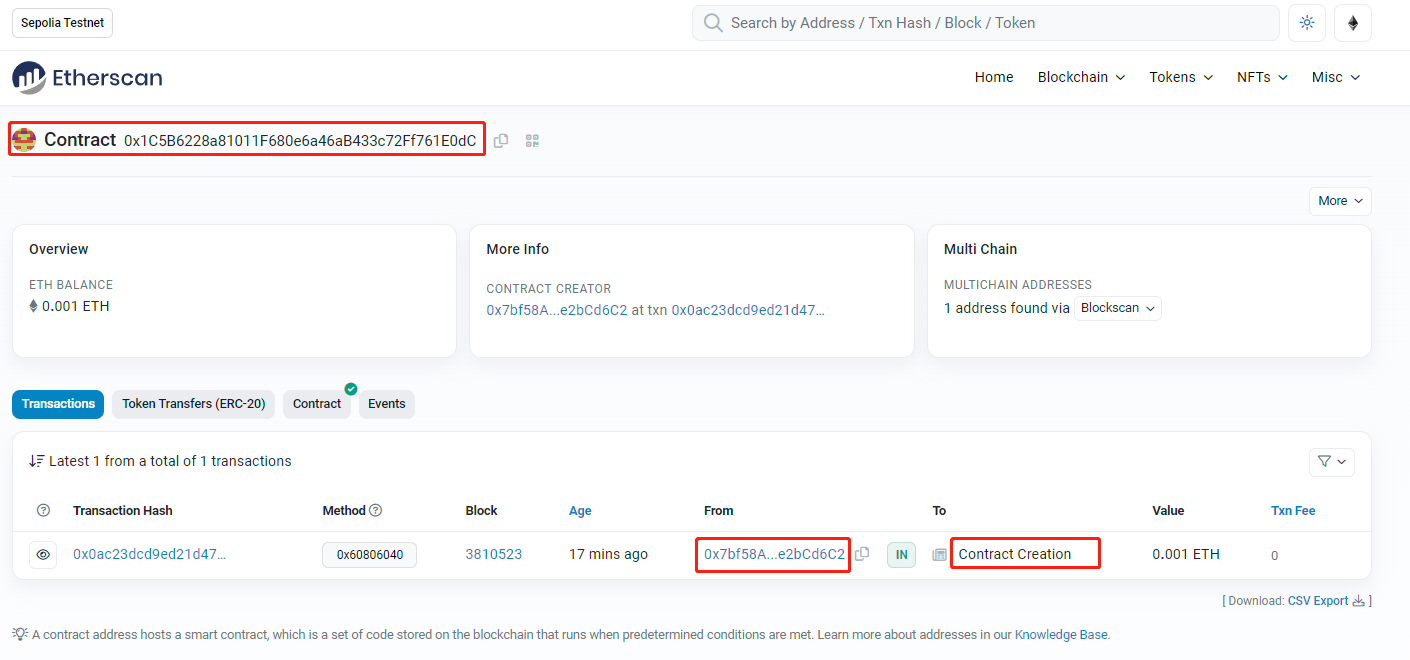
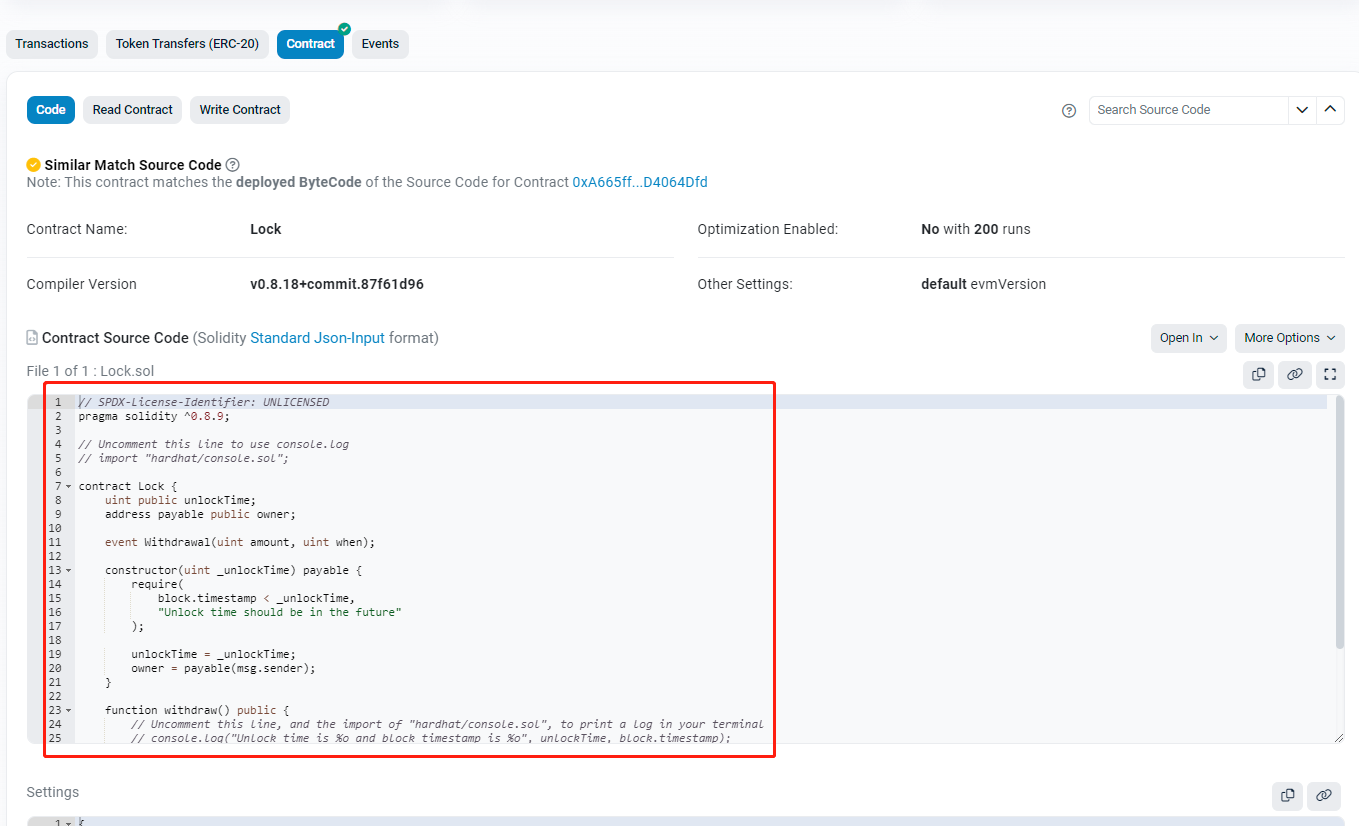
可以看到合约已经成功部署,是我们hardhat初始的Lock合约
主网和测试网的部署方式基本相同,也是按照这个配置来进行部署
verify源代码
当我们部署合约之后,我们需要上传源代码以供别人进行查看,别人会对你的代码进行审查,如果你的代码写的不好或者被找到bug,那么别人就不会用你的合约,你发行的代币将会没有任何价值,所以这一步是非常重要的。
细心的朋友就会发现,我们上面的Lock合约部署了,为什么会直接看到源代码呢,那是因为Lock合约已经verify过了,想同的合约,代码不发生任何变化,hash就不会变,就不需要重新verify了,部署之后就可以直接看到。
我们可以手动verify源代码,也可以通过hardhat进行。
手动verify
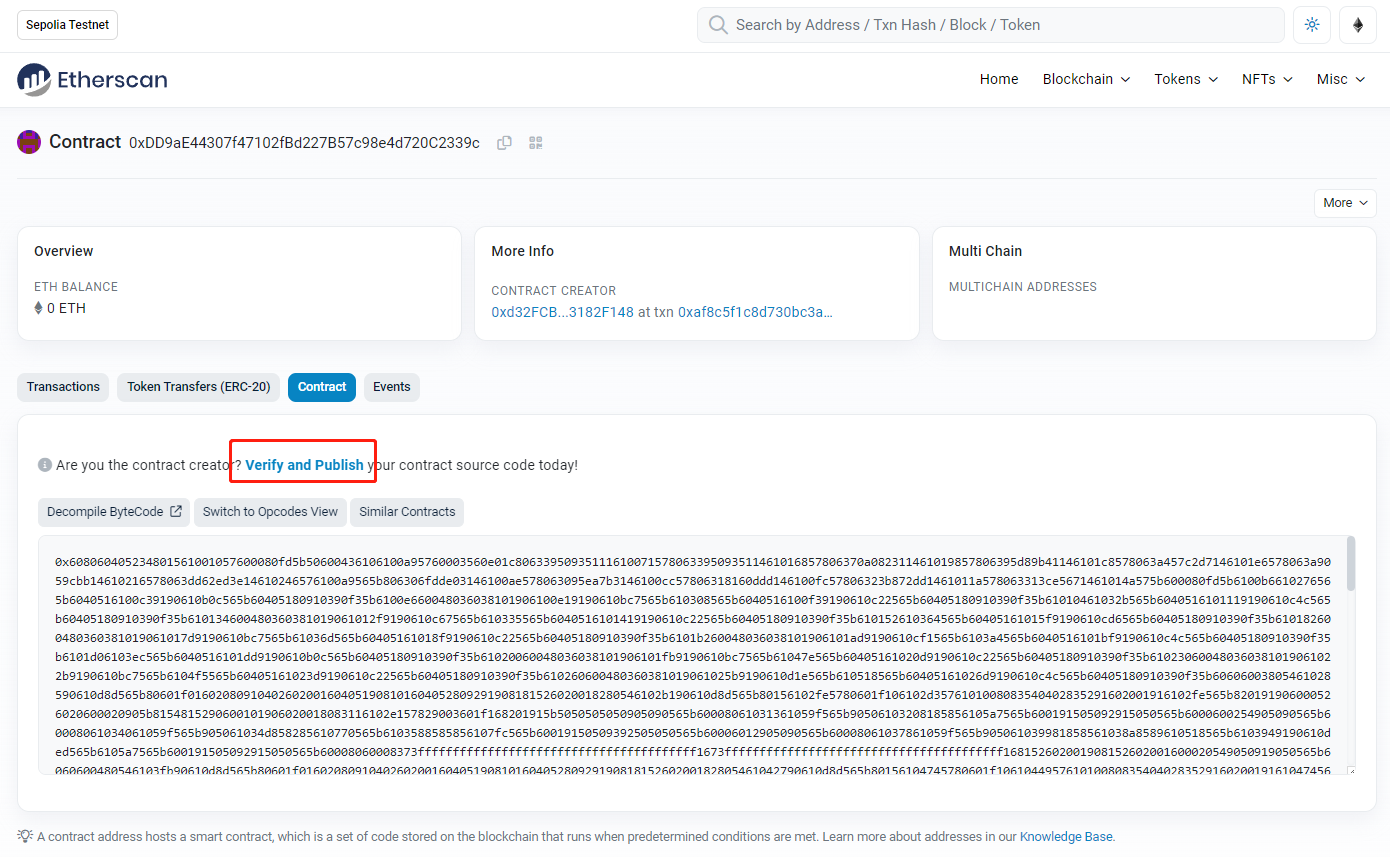
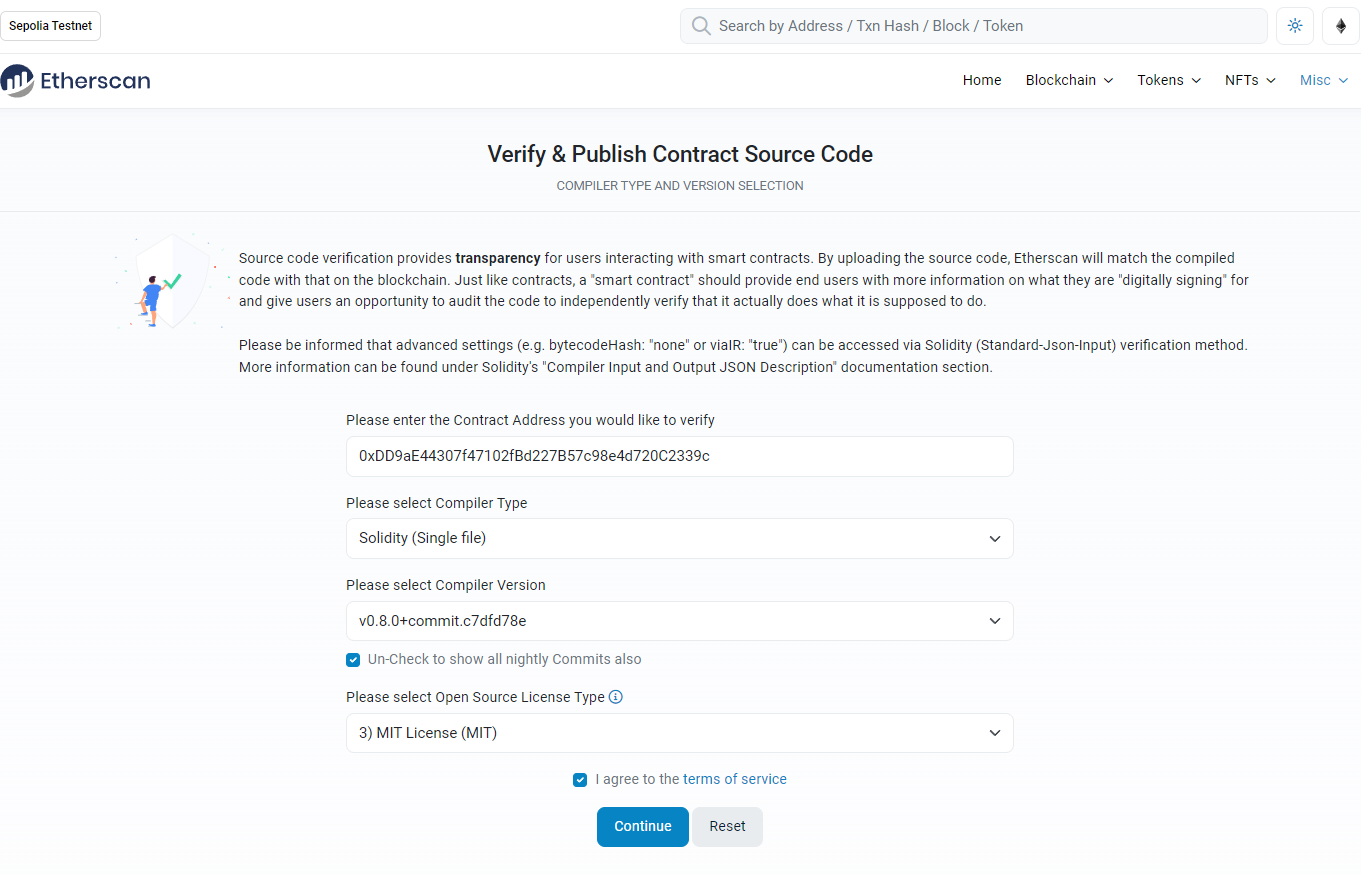
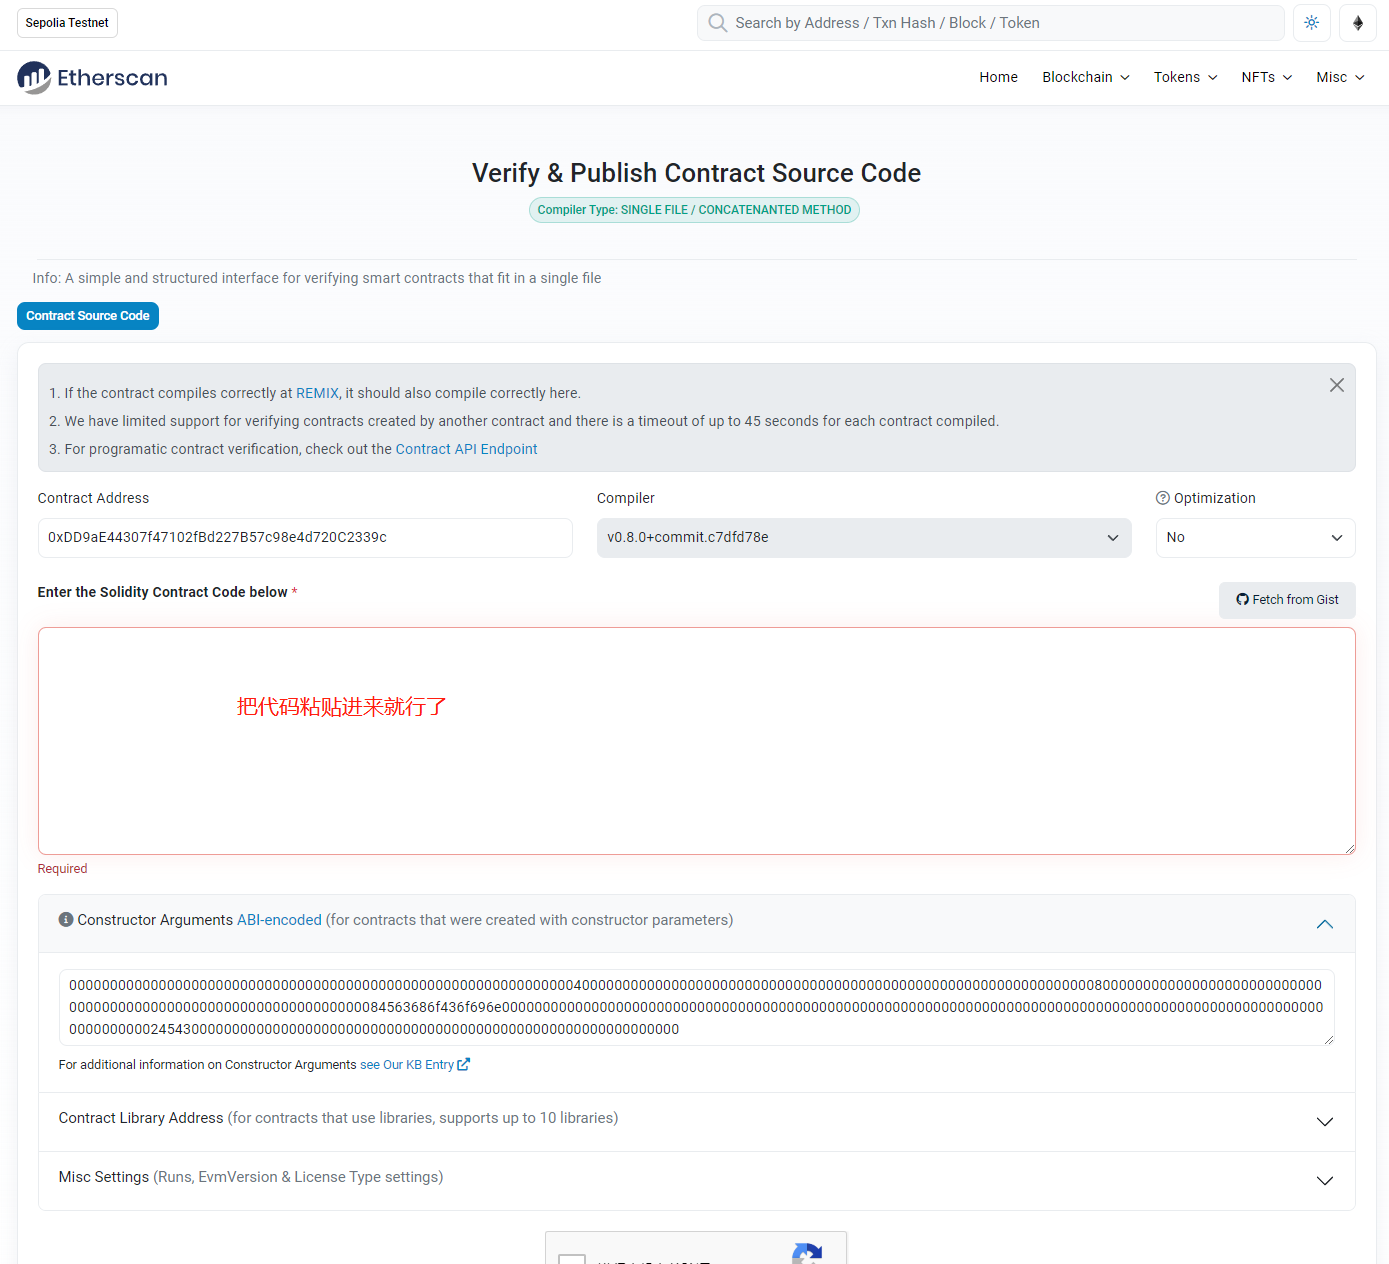
手动verify很简单,找到部署的合约地址,可以看到我们的Contract是不可读的,按照下面的步骤进行代码上传就行了。
但是有个问题是手动部署合约,只适用于部署单文件的合约,如果你的合约引用了 openzeppelin 的合约,那么你就需要一个一个手动传,非常麻烦,这里就不做演示了,按照下面一步一步来就可以了。
使用hardhat verify
假如我们的合约是,引用好了几个 openzeppelin 的包,这样手动上传就不合适了,因为 openzeppelin 的包还可以引用它里面其他的包,层层引用,手动verify十分低效
// SPDX-License-Identifier: MIT
pragma solidity ^0.8.0;

import "@openzeppelin/contracts/token/ERC20/ERC20.sol";
import "@openzeppelin/contracts/token/ERC20/IERC20.sol";
import "@openzeppelin/contracts/access/Ownable.sol";

contract EchoCoin is ERC20 {
    constructor(
        string memory name_,
        string memory symbol_
    ) ERC20(name_, symbol_) {
        _mint(msg.sender, 100000000000000000000);
    }
}
先来部署下,下面是部署脚本,十分简单
// We require the Hardhat Runtime Environment explicitly here. This is optional
// but useful for running the script in a standalone fashion through `node <script>`.
//
// You can also run a script with `npx hardhat run <script>`. If you do that, Hardhat
// will compile your contracts, add the Hardhat Runtime Environment's members to the
// global scope, and execute the script.
const hre = require("hardhat");

async function main() {
  const EC = await hre.ethers.deployContract("EchoCoin", ["EchoCoin", "EC"]);

  await EC.waitForDeployment();

  console.log(`deployed to ${EC.target}`)

// We recommend this pattern to be able to use async/await everywhere
// and properly handle errors.
main().catch((error) => {
  console.error(error);
  process.exitCode = 1;
});
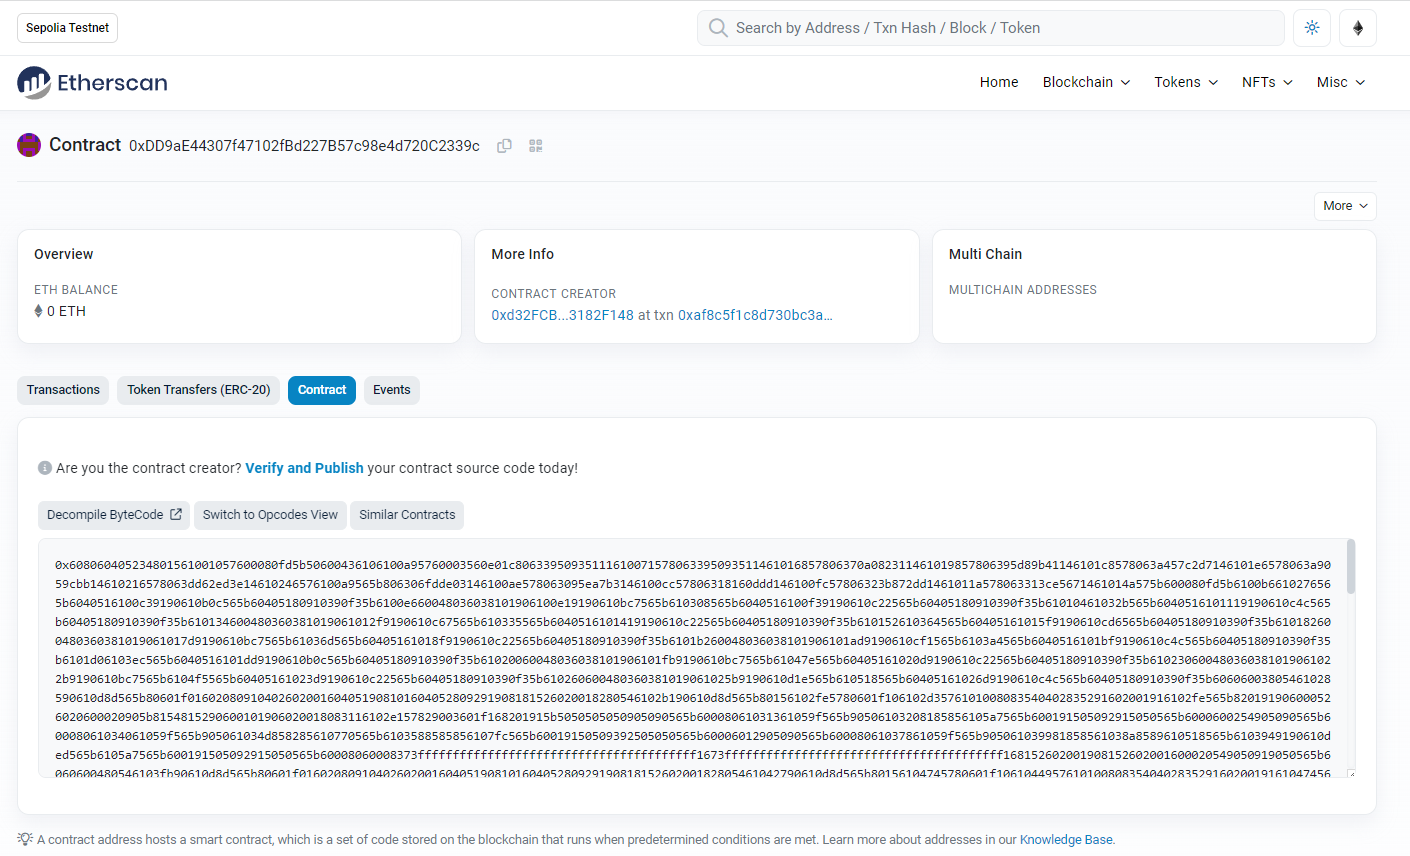
执行部署不成功,合约地址是0xDD9aE44307f47102fBd227B57c98e4d720C2339c,源代码并不可见。
$ npx hardhat run scripts/deploy.js  --network sepoliaTest
Compiled 1 Solidity file successfully
deployed to 0xDD9aE44307f47102fBd227B57c98e4d720C2339c
我们可以执行hardhat命令来进行verify
$
$ npx hardhat verify --contract contracts/EchoCoin.sol:EchoCoin 0xA3140E22B8252f46168c52A476EB89f8959Ad3de --network sepoliaTest

The contract 0xA3140E22B8252f46168c52A476EB89f8959Ad3de has already been verified.
https://sepolia.etherscan.io/address/0xA3140E22B8252f46168c52A476EB89f8959Ad3de#code
可以看到我们已经verify成功,并为我们打印出了合约代码的url地址,我们上去看一下,可以看到 openzeppelin 里的代码也帮我们上传了,不需要我们手动一个一个上传了。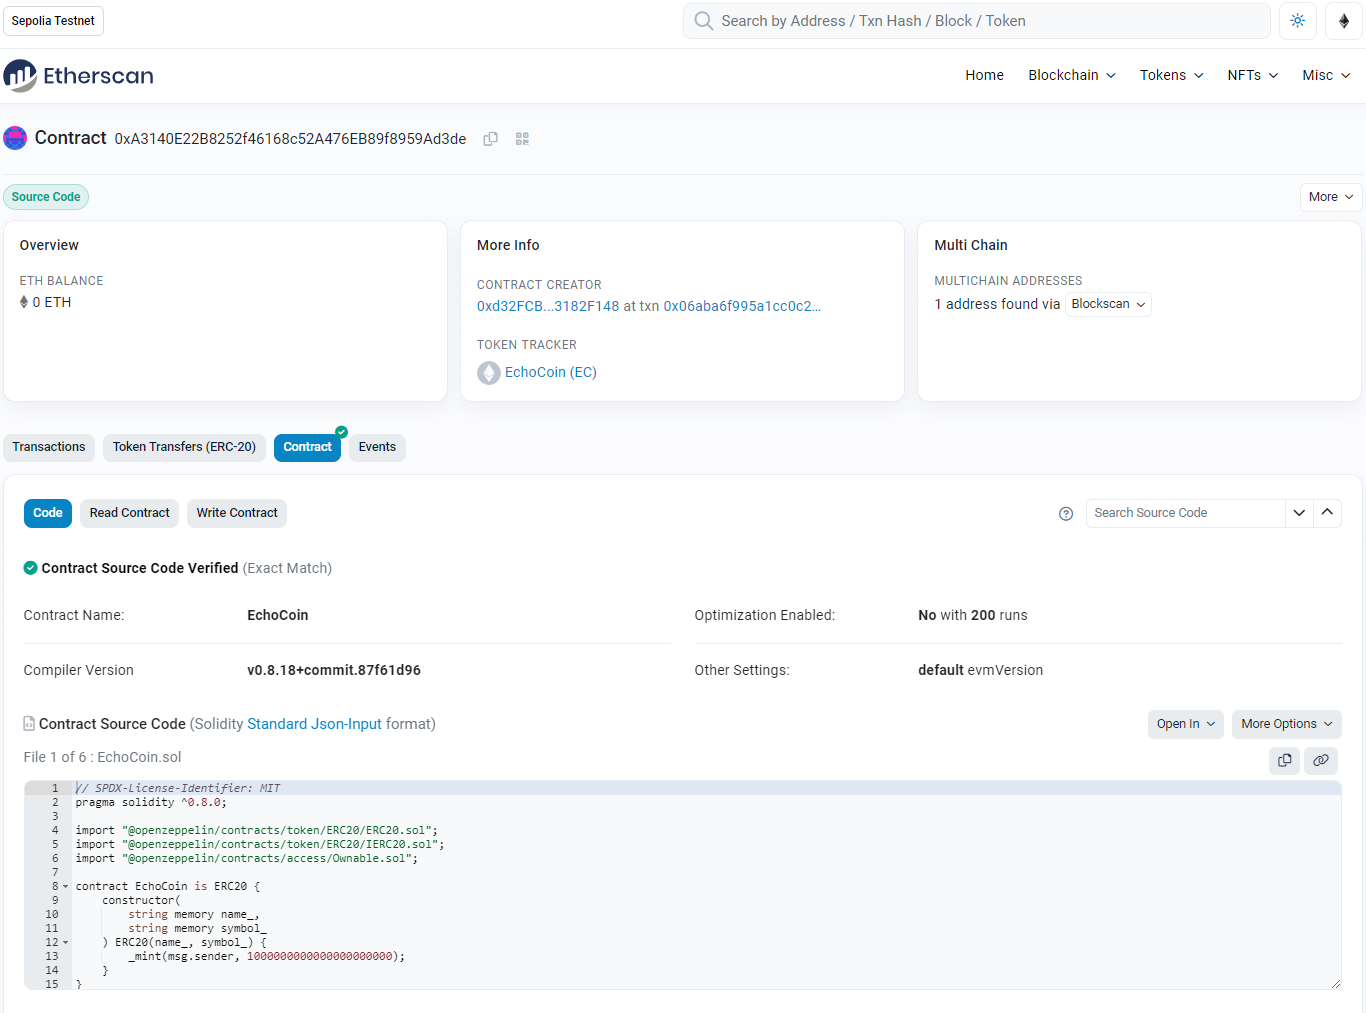
还会为我们生成abi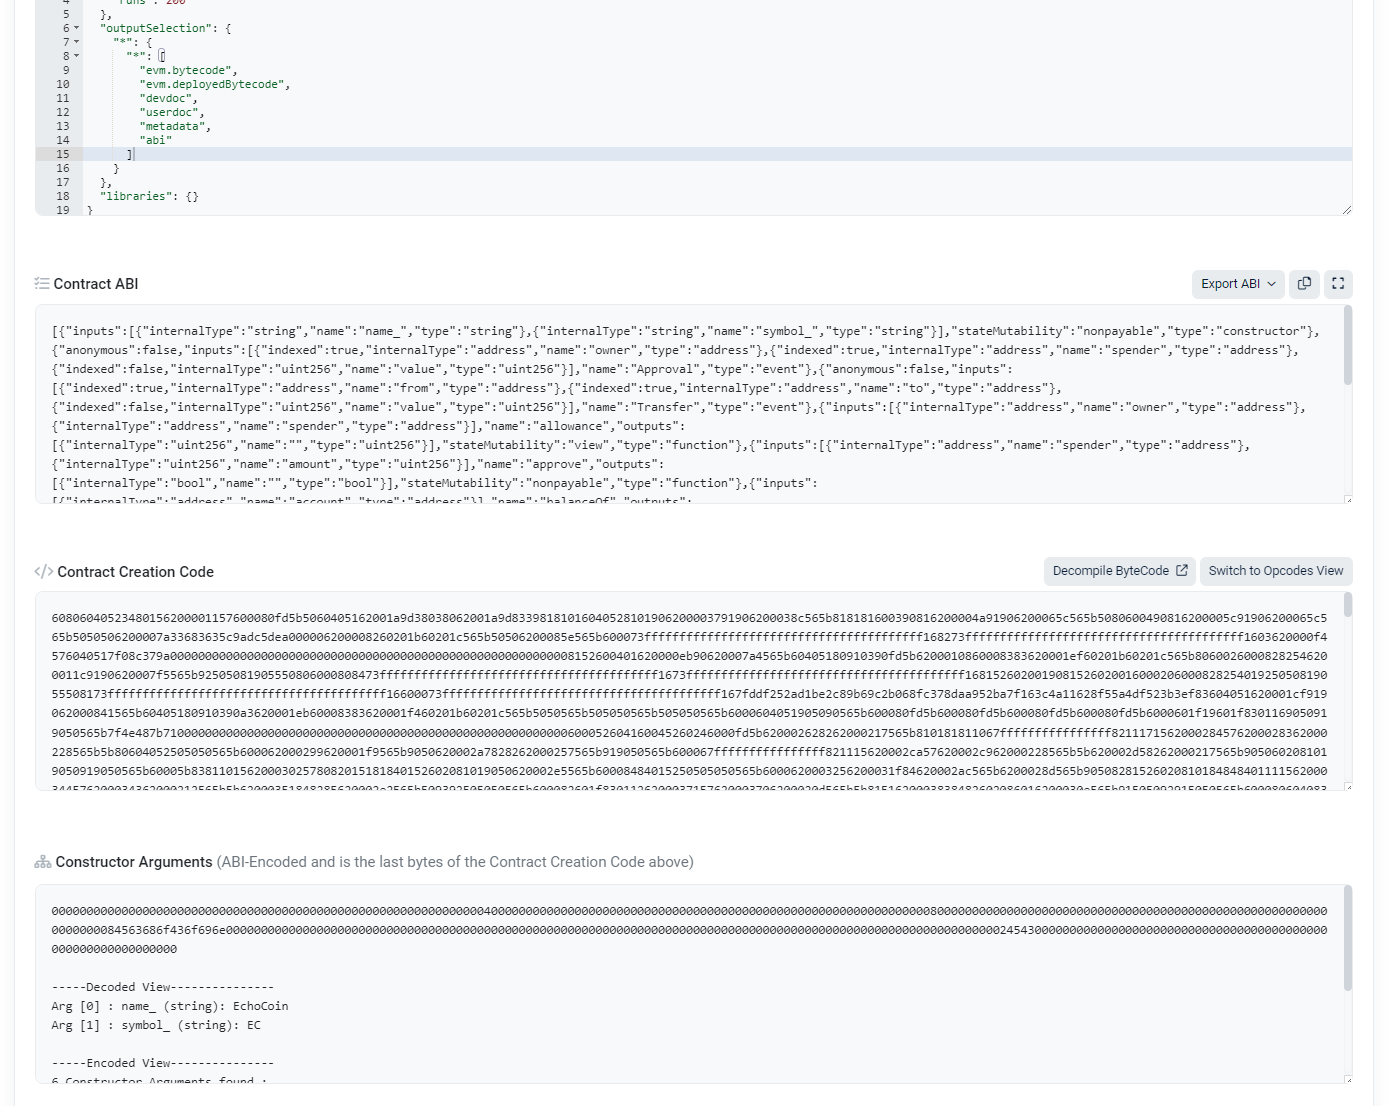
如果我们再重新部署一下这个合约,那么Contract源代码是直接可以看到的,因为我们合约没有改变过,新部署的合约地址0xaB2BB7058aF71A6616173448Ce25F416b24E2F03
$ npx hardhat run scripts/deploy.js  --network sepoliaTest

Compiled 1 Solidity file successfully
deployed to 0xaB2BB7058aF71A6616173448Ce25F416b24E2F03
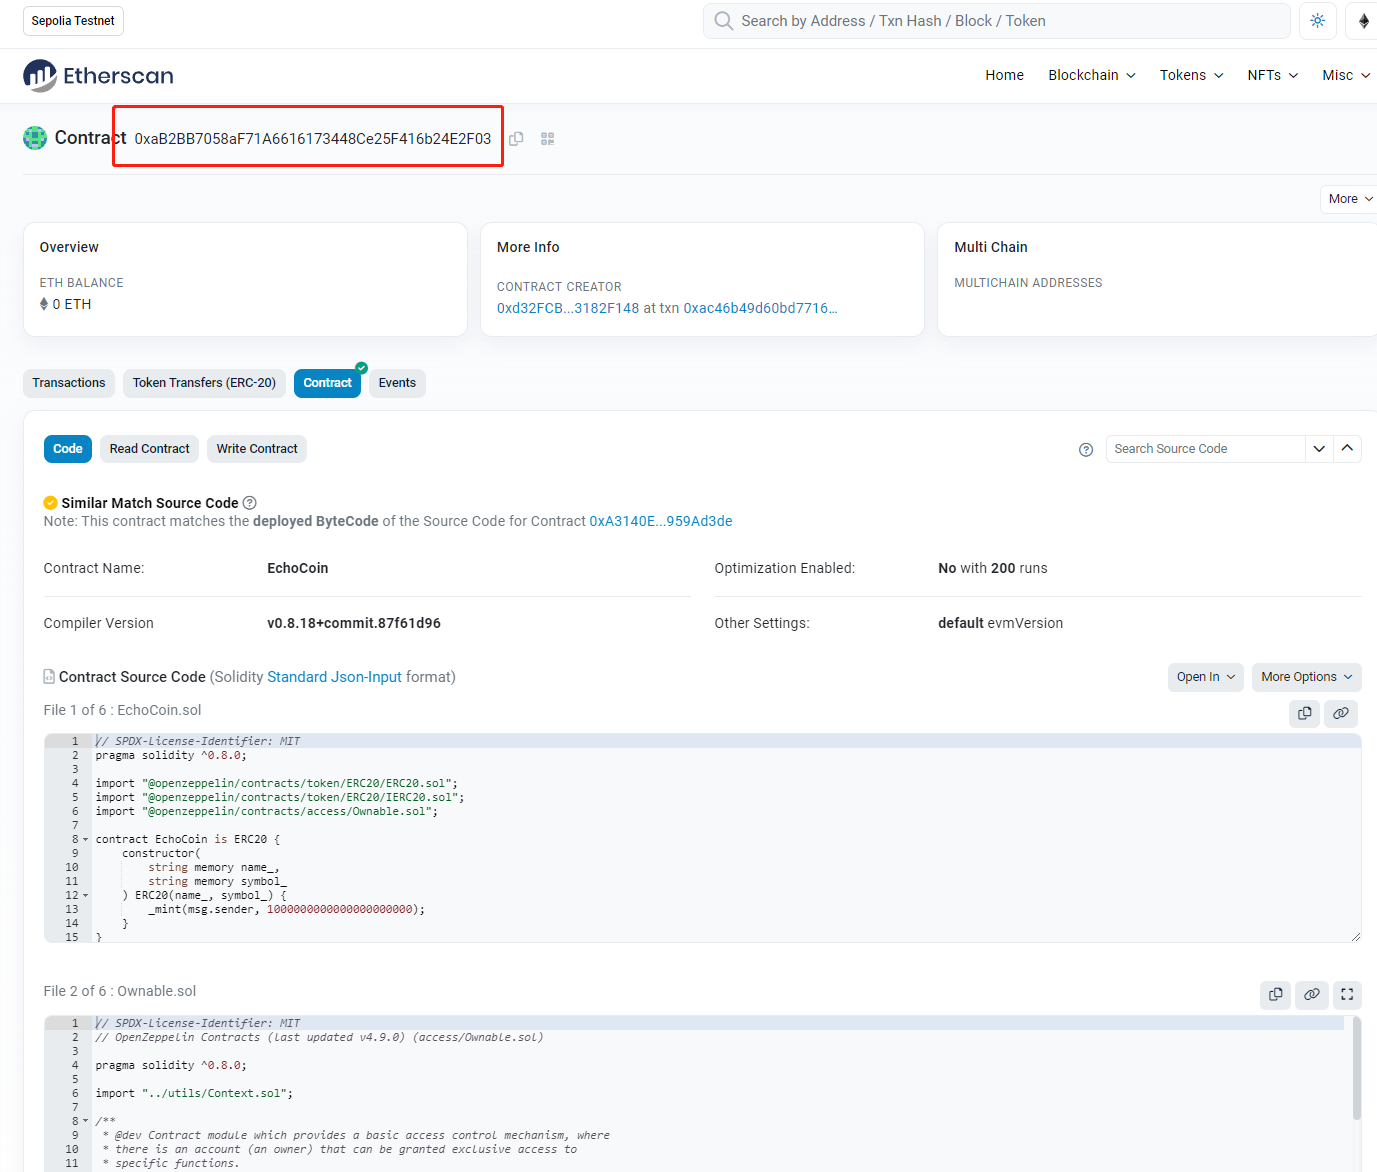
更多用发可以查看官方文档Verifying your contracts
转载请注明来源,欢迎对文章中的引用来源进行考证,欢迎指出任何有错误或不够清晰的表达。可以在下面评论区评论,也可以邮件至 289211569@qq.com